
Drainage - Compacted Soil Layer - Auger
Compacted Soil Layers, Hardpan, Tillage Pans
Copyright 2011 by Mario Vaden - Also, see Drainage Information and Tips

advertisement
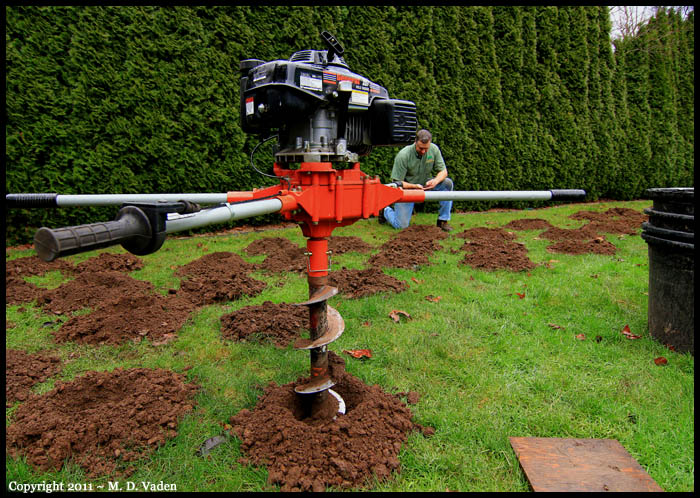
The yard below is a classic example of drainage problems when a hardpan or compacted soil is buried beneath other soil without the problem being corrected first. The compacted layer in this Wilsonville, OR, back yard was buried about 12" to 14" deep. Situations like this are cost prohibitive for homeowners to hire excavators for removal of entire 16 inch deep layers, followed by replacement of new soil. It's not realistic to eradicate an entire side and back yard along with the irrigation system: not for most people.
One affordable solution is boring holes with an auger, and backfilling with sand, which is porous. This allows rainwater to run down into the sand instead of puddling excessively. Like miniature drywells in a way. The hole surface can be left as sand, or topped-off with a mixture of like 80% sand and 20% soil to plant grass seed in. That can lead to a color difference that shows in the summer. On the other hand, the homeowner can choose to fork-out thousands more to completely replace the top 16" of their yard entirely.
Based on its location and year built, this yard's compacted soil layer could be due to any of the following being left in place and buried beneath a thick layer of soil:
Old packed dirt or gravel driveway
Parking area where heavy equipment or farm equipment was parked
Location where farm animals with hoofs walked around continually
Wheels of heavy equiment compacting soil during construction, then covered with more earth
Tillage pan caused by old plowing equipment compacting soil after many occassions of cultivatingWhatever is was, the problem was present and evident by digging down in several spots. The compacted layer was about 2 inches thick. The auger reached it in every hole shown above, where it slowed down for a moment until it bored through.
Afterward, removing soil and adding sand is all that's left. Watering the sand in with a hose can help to settle the sand. Then a little more may need to be added: worth doing before overseeding with grass seed, or laying mulch if its in a shrub bed area.
This technique is fairly simple and streamlined. It can be done just as holes only, or incorporated with a drain line. Why and how to incorporate it with a drainline is not a short explanation, and is not essential on this page. If you are curious about that, don't email me for clarification. My free advice is limited to these pages I choose to write in spare time
For this particular property, I had a chance to see it about 5 months afterward in late May, before the rain waned in our area. The ground was much firmer, no standing water, and the holes had become inconspicuous. The homeowners were satisfied.
A solution like this may not necessarily improve the surface soil, but it can greatly prevent further significant damage to the upper soil. Besides, the main problem was deeper. But ... standing water provides lubrication, and lubricated soil can compact even worse, because soil particles compress together more while walking on them if they are wet. Typically, the dryer the soil, the less it compacts under foot traffic. Likewise when rolling lawn mower wheels over the lawn soil.
advertisement